

How To Upload A Personal Watermark On Deviantart
If you've spent more than than 5 minutes online, yous've probably seen an image with a watermark. Watermarks make it easier to evidence the source of an image, whether you're a professional person photographer or you just desire to make sure you get credit for your sweet memes.
Before we dive in, it's important to choose what kind of watermark you want to add together. Adding plain text is the simplest kind of watermark, but if y'all're an artist or a business possessor with a brand, it's improve to use a graphic watermark that helps support your make past boosting visual recognition.
No thing which route you accept, hither are a couple of quick means to add a watermark in GIMP!

Quick Navigation
- Adding A Text Watermark In GIMP
- Adding A Graphic Watermark in GIMP
- Bonus: Calculation A Watermark Using GIMP Brushes
- One Last Word Near Watermarks
Calculation A Text Watermark In GIMP
A text watermark is the simplest kind of watermark that you lot can add together. Information technology doesn't have whatever of the benefits of a fancier graphic watermark, simply if you just desire to add together the name of a Facebook group or your Twitter username before sharing an image, this is the easiest way.
Open up upwardly the image that you want to watermark in GIMP, and select the Text tool from the toolbox or use the shortcut T. I find the toolbox area to be frustratingly cramped when trying to choose a font since the font selection dropdown tin can't scale upwards. Let's utilize the Font dialog instead!
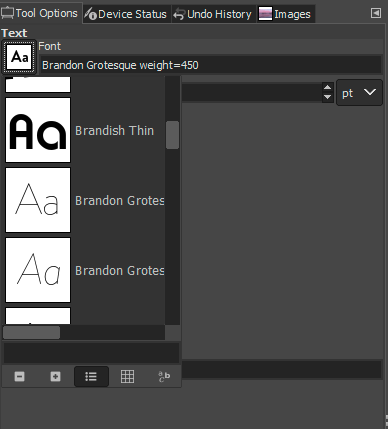
Open up the Window menu from the menubar, cull the submenu Dockable Dialogs, and then cull Fonts. The Fonts window should appear on the right of the interface, displaying a list of your available fonts in a scalable window, letting yous encounter your options more clearly.

Choose the area of the paradigm where desire to put your watermark, and click and drag to draw out a text box. Yous'll see that a small overlay appears with handy controls – simply keep in mind that if you change the settings here and and so delete your text, they will all revert to the toolbox settings.
Click on the text box, so enter the text yous want as your watermark. Adjust whatever other type settings you demand, and then hit Esc to stop typing and get out the Type tool. Y'all tin can always go back to it later if you lot need to arrange your settings by clicking on the text box using the Type tool.
If it turns out that your watermark isn't exactly in the right place, switch to the Move tool and drag it into position. If your image moves instead of your text, make sure that y'all have your text layer selected in the Layers palette, and that the Move tool is set to Move the Active Layer.
If you want to make your text slightly transparent in the archetype watermark style, select the text layer in the Layers palette and conform the Opacity setting until you're happy with the results. Just brand sure that yous don't make it and then transparent that people ignore information technology!
Adding A Graphic Watermark in GIMP
Calculation a graphic watermark in GIMP is even easier than adding a text watermark, and it gives you lot near space flexibility when it comes to the content. For this guide, I'm bold you've got your watermark in a split file, preferably in PNG format with a transparent background.
(If you don't already accept a brand logo or wordmark set for your graphic watermark, y'all might desire to visit the quick guide I've prepared about how to make a logo in GIMP. If you take an image but it's not on a transparent background, you can read the consummate how-to post here.)
Open upwardly your unwatermarked image, and and then import the watermark file by opening the File menu and choosing Open up As Layers. You tin can besides utilise the shortcut Ctrl + Shift + O (or Cmd + Pick + O if y'all're on a Mac). Your watermark image should announced, ready for placement!
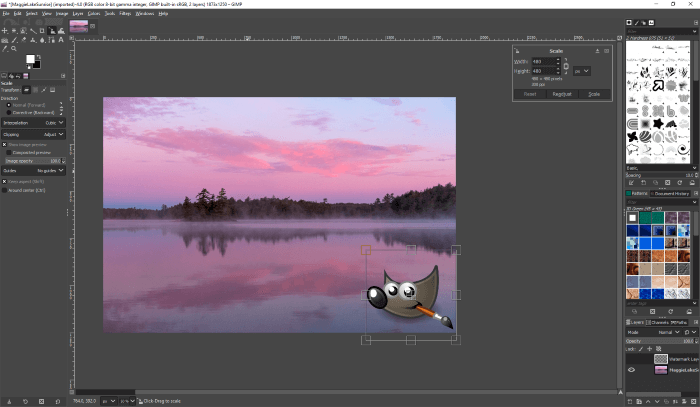
Depending on the pixel dimensions of your source image and your watermark image, you lot'll probably have to practice a little bit of resizing of the watermark to make it look good. Adjust the sizing using the Scale tool, and then adjust the placement using the Motility tool. That's all there is to it!
Bonus: Adding A Watermark Using GIMP Brushes
If any of you advanced users want to get extra fancy, yous tin even create a brush in GIMP using your watermark. Once it'due south set upwards, this lets you watermark a whole lot of images very chop-chop with merely a single click – although the graphic watermark method is still pretty good for that too.
If you're interested in this bonus technique, check out the how-to guide on making GIMP brushes.
1 Last Word Most Watermarks
Someone real (not Uncle Ben) probably also said 'with corking ability comes keen responsibility'. Now that yous know how to add together a watermark in GIMP, make sure that y'all but utilise your powers for good 😉
Protect your own images in the wilds of the internet, and never effort to take credit for another artist'southward work. Proper attribution makes the whole artistic community stronger!
Source: https://thegimptutorials.com/how-to-add-watermark/
Posted by: currycouldayse.blogspot.com
0 Response to "How To Upload A Personal Watermark On Deviantart"
Post a Comment